Steel Posts
It is recommended to use galvanised or painted posts to prevent rust.
Steel posts are available from your local hardware or steel supplier.
The steel post colour can be matched to your shade sail and environment
and can be cut to pre-determined lengths. It is recommended to either
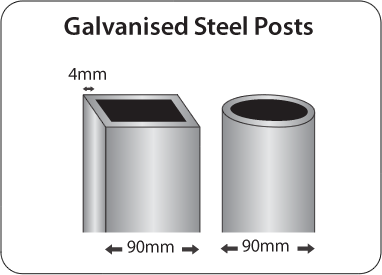
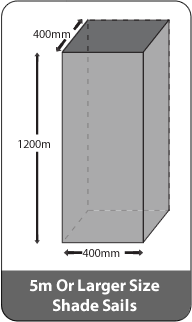
use a round steel post with a minimum diameter of 90mm, or a 90x90mm
square steel post. Post wall thickness should be a minimum of 4mm. It is
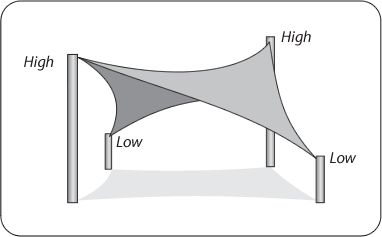
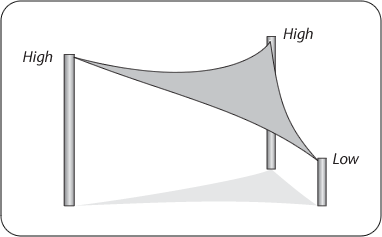
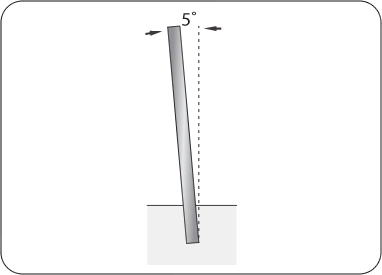
advisable to lean posts at an angle of 5 degrees, sloping away from the
centre of the shade sail for additional support.